Rain Water Tanks
 In planning or designing your property to grow more food, your first consideration should always be water. Water is life, and if you get your water design right, most other things will fall into place.
It is fairly common in Australian cities to let enormous amounts of perfectly clean water flow off your roof into the drain only to pipe mains water back in at both your own and the environment’s expense. This practice doesn’t make any sense when for a little one-off thought, expense and work, you can catch your rain water in a tank for later use. It is not just about securing yourself against the prospect of raising water costs and Stage Four water restrictions, but doing your bit for conserving Australia’s dwindling water resources. It also gives a wonderful feeling of security entering a dry spell with a tank or two full to the brim (just like having a big pile of chopped firewood in the shed before winter).
So read on, and this article will help show you how to set up tanks, pipes, and other bits of plumbing to ensure that your food plants are never stressed by too little water or flooded with too much (unlikely in Melbourne!). We will go through the three steps of sound water design: collection, storage, and distribution. If you don’t have time to read this whole piece click here to at least avoid the three most common mistakes made when installing rainwater tanks.
Collection
Start by thinking about all the hard surfaces on your property – the surfaces that shed water, such as your house, garage and shed roofs. If you figure out the approximate area of these surfaces, you can then calculate how much water you could collect. Let’s say your house and garage roofs total 250 square meters. Let’s also say you live in an area of Melbourne that receives an average of 600 mm of rainfall each year. If you multiply these two numbers (250 x 600), you get the total litres of water hitting your roof each year, in this case 150,000 litres. Multiply this by 0.85 to account for loss due to splash and evaporation, and you have the amount you could realistically catch and store, in this case 127,500 litres. Now that is a lot of water!
Storage
How much storage?
Now you have an idea of how much water you could catch and store, it’s time to have a think about how much you need to catch and store. The ideal situation is having enough water in your tank or tanks to keep your edible garden flourishing through a three full months without a drop of rain in late summer. This is called designing for extremes. As a rule of thumb, you want to store 8-10 litres of water per day for every square meter of garden bed and 5 litres for every establishing fruit tree in the summer period. Say you had a 20-square-meter garden and ten fruit trees. That’s about 230 litres of water per day, or 20,700 litres of water to get you through three months. That’s a decent sized tank.
However… if you do have access to mains water there are diminishing returns on your water savings with larger tanks. A 4,000 litre tank will likely save you at least half as much mains water as a 20,000 litre tank. That’s because you do in reality usually get a bit of rain in summer, and you’re not really having to store up all you need for the full period.
You may get away with less if you are also using greywater in the garden. However, you should also consider, whether now or in the future, if you want to plumb some of your tank water into your house. It is common these days to hook your tank up to your toilet, washing machine and bathroom sinks (and to get a rebate for it too). In future it will probably become more common to plumb rainwater into the kitchen too. So whether or not you want to take these steps now, adding any extra tank capacity can’t hurt. This is called designing to keep your options open.
Types of tank
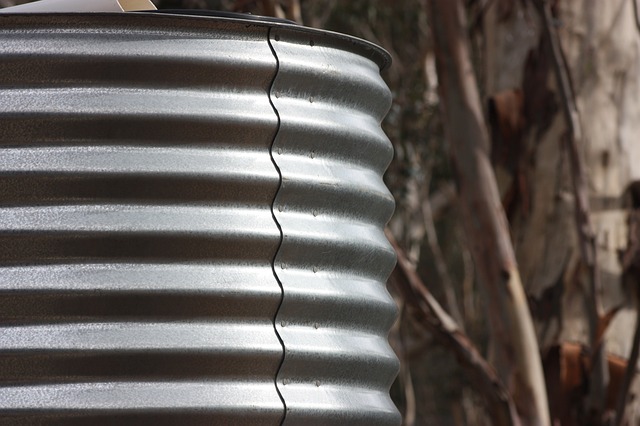
Okay, so you know about how much water you want to store. You now have to figure out what kind of tank you want. The most common options are poly (plastic) and steel, though bladder tanks, underground tanks and concrete tanks may turn out to best suit your site. Steel tanks available in zincalume, colourbond, and long life stainless, can be made to size — good for small properties or unusual spaces. However most steel tanks require a concrete slab which is an extra expense. Larger (20,000 litre plus) steel tanks can be bottomless, and lined with a plastic lining and don’t necessarily require a slab. Poly tanks can be sat on packed sand, easier and cheaper to make. They probably last at least as long as zincalume and colorbond steel, but not as long as stainless. Concrete tanks are generally used only on rural properties, as the walls are thicker. Bladder tanks can be situated under decking.
How many tanks
It often makes sense to distribute your required storage over two tanks, especially if it is hard to get water from different sides of the house to one place.
Working with gravity
If your land is flat or if your land slopes downhill from your house or garage, you have the option of gravity feeding water to your gardens without a pump. If your land slopes uphill from your house then you are going to need a pump, with two basic set-up options. The first is to catch the roof water in an initial tank or a plastic catchment pit, and then to pump water with a float-triggered pump from that tank to a header tank at the top of your property, which you can then gravity feed from. The other option is pump directly to the garden. We much prefer the first option.
Tank overflow
Legally, you have to ensure that when your tank overflows, that this surplus water returns to the stormwater drains.
Installation tips
As the rainwater flows from roof to tank, there are a variety of options you or your plumber should know about when installing the system. In short, and starting at the roof, there are options of :
• normal guttering or guttering that excludes leaves and other debris
• first flush diverters which divert the dirty initial flow of water away from the tank
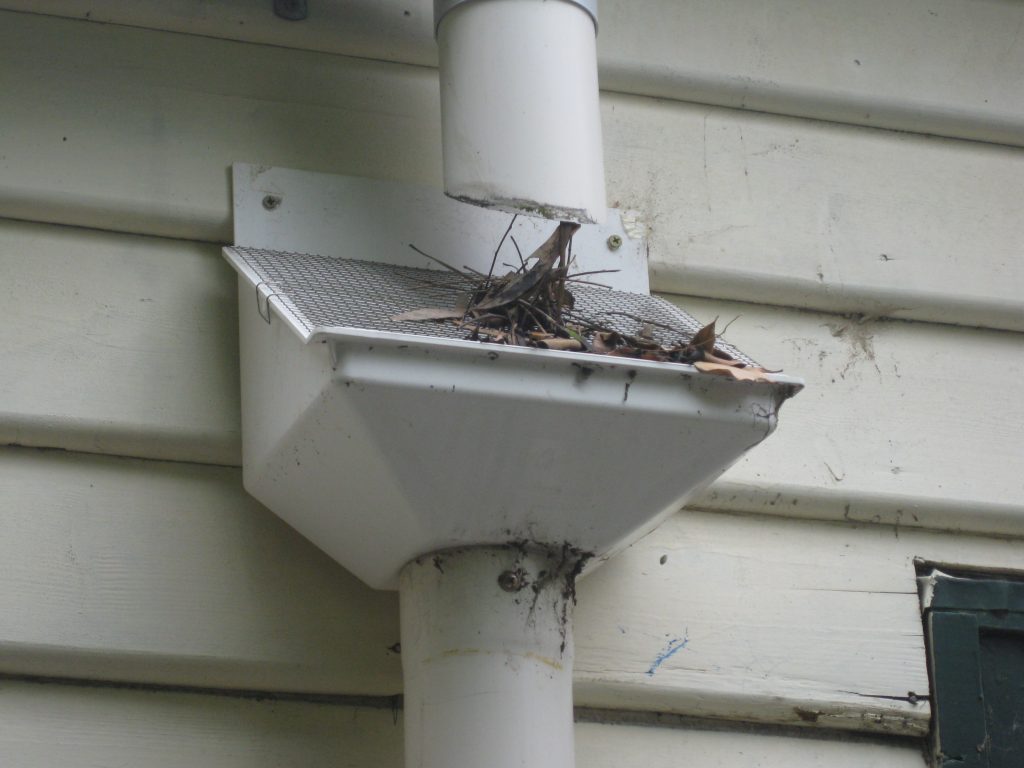
• leaf diverters (pictured below) which flick leaves out of the way
• charged or wet systems where the pipe from roof to tank runs sideways underground or dry systems where the pipe stays up in the air
• mesh valves to prevent mosquitos from entering the pipe
Inside the tank there options of water level indicators and floating outlet pipes to take water from near the surface (where it is less dusty and more aerobic).
Distribution
Okay, so you have your tank or tanks of the right material, capacity and number for your site. They are plumbed into your downpipes so they fill up when it rains. We now need an efficient system for getting water from the tank to our growing systems – our herbs, vegetables, and fruit trees. This is the distribution side of the equation and our distribution systems follow a basic pattern regardless of whether the water is coming from a tank or the mains. We start with an automatic timer you can set to irrigate whenever you want. Below this is an inline filter to remove any remaining sediment in the water and if necessary a pressure reducer so the system doesn’t blow apart. We then run 19mm black poly pipe along one edge of the garden or orchard to be irrigated, using 90 degree elbows to get around corners. Sometimes this pipe we run in a big circle back to the beginning, which gives us equal pressure all the way around. This pipe we call the main.
Next, off the 19 mm poly pipe main we run 13 mm dripline, looping it if possible back to the main. This dripline we run underneath mulch so the water dripping out can’t evaporate.
So that’s our introduction to installing rainwater tank systems to irrigate gardens and orchards. We hope it is helpful and easy enough to read. We welcome feedback that would help us improve it, including any recent tank or plumbing innovations we’re not yet aware of.
Thanks for visiting our site, and get in touch if you’d like our help designing and installing your water system (not to mention your veggie gardens, orchards, chooks, bees, and everything else!).
Happy and sufficiently moist food gardening to you!