We’ve now got a whole website devoted to wicking beds. You can buy conversion kits there and see an updated version of this article. 🙂
We’ve created a sequence with all the info you need to get started building your own wicking bed – i.e., a veggie bed that waters itself from below. It’s based on our years of experience installing wicking beds in Melbourne, Australia. We sincerely hope your water wicks well and your garden grows green and lustrous. Let’s start with the basics—and wonders—of wicking beds:
On this page:
Elsewhere, on our wickingbeds.com.au site:
Here’s also an intro video about what VEG Wicking Beds does:
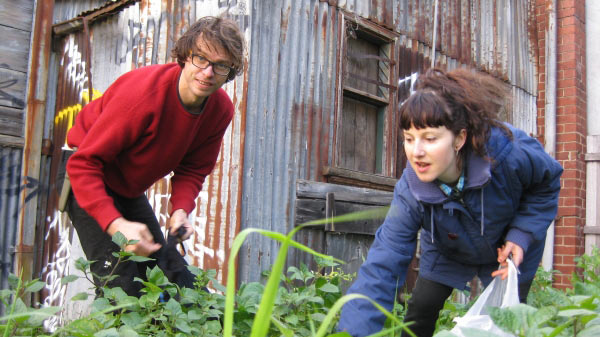
When we first started Very Edible Gardens (VEG) back in early 2009, we had no idea what a wicking bed was. Then, after a year or so of installing raised vegetable garden beds all over Melbourne, someone whispered the words into our ears. “Wicking beds,” they said. “We want some wicking beds.”
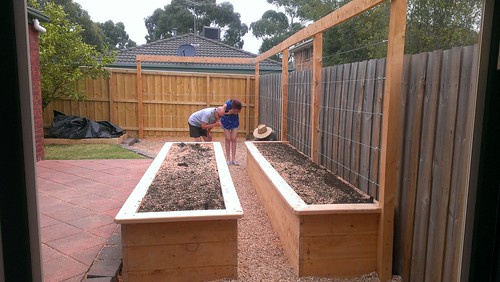
“Wicking beds” we thought, smiling and nodding, then scratching our heads. “What on earth is a wicking bed?” So we did some research and, equal parts intrigued and skeptical, we started to experiment. Up till then, all our raised veggie beds had been either hand-watered or set up with ‘dripline’ irrigation. But now we started setting up wicking beds in old bathtubs:
example
…and then, using plastic liner, in our raised VEG beds which are assembled from sleepers of locally harvested golden cypress (Cupressus macrocarpa) timber:
So, What the Heck are Wicking Beds?
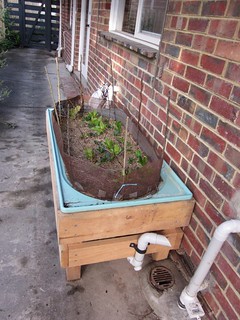
Invented by an Australian named Colin Austin, the idea with a wicking bed is that you prevent water from leaving the bottom of the bed with a waterproof liner or layer. This creates a water reservoir underneath the soil. Then, rather than having to irrigate by watering from above (via drip irrigation, a hose, watering can etc), the water literally wicks up into the soil from below, keeping it nice and moist.
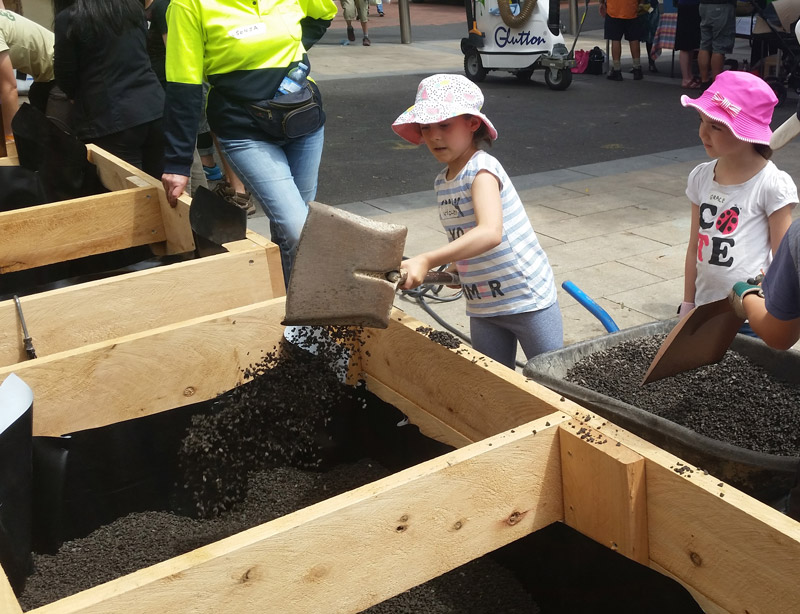
Now, with all that water, this could easily get messy and even stinky. But, you prevent the weight of the soil from squashing all the water out – and making a muddy mess – by having the water sit within a layer of small stones, which is able to accommodate the water whilst bearing the weight of the soil (and your prize pumpkins!) without collapsing. You prevent the soil from washing down into gaps between the stones with a sheet of something that lets water wick up, but stops soil moving down.
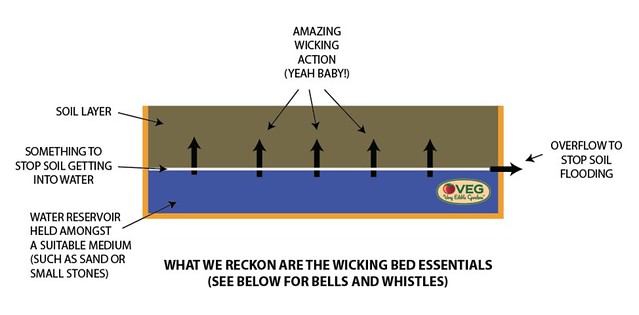
bed reservoir
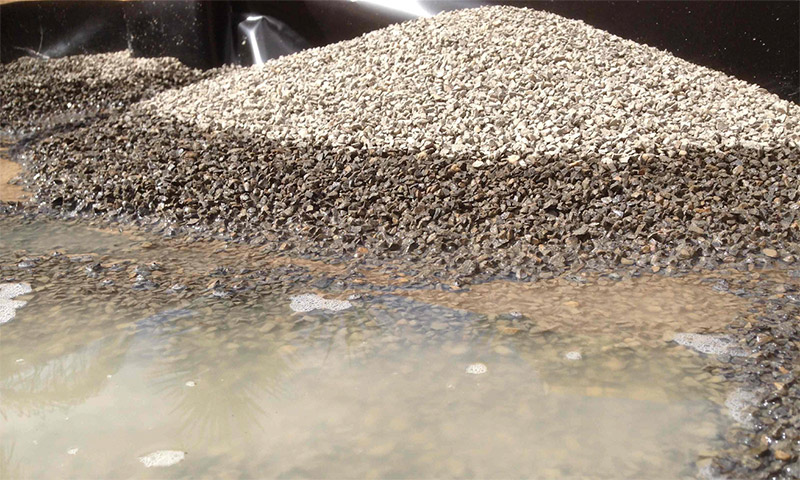
up the stones!
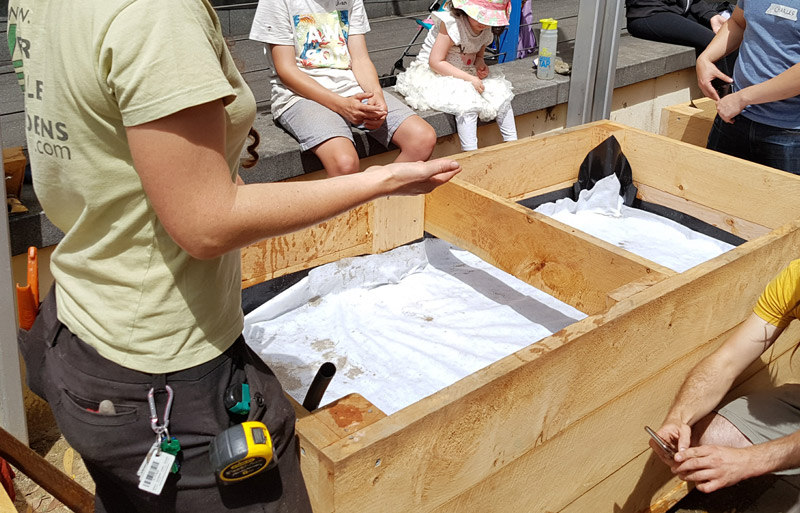
fabric layer which separates the soil (coming
next) from the water reservoir
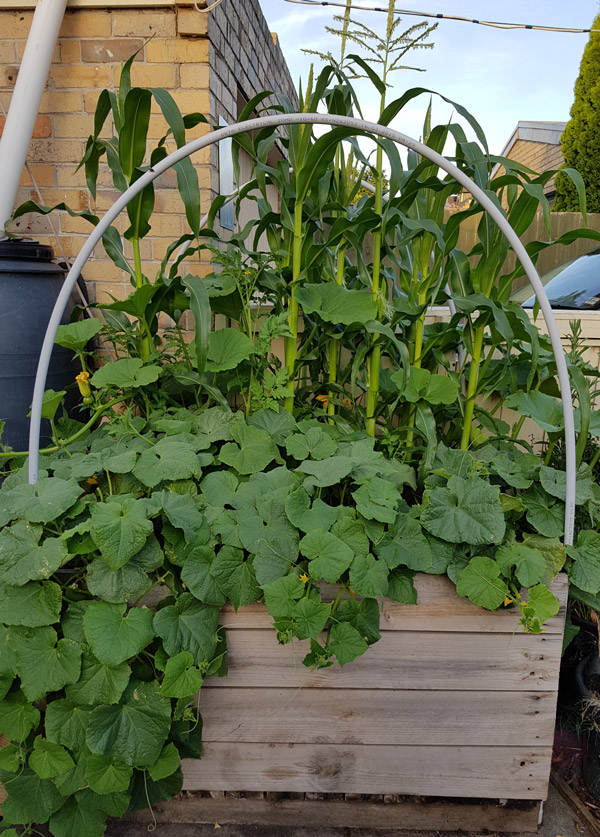
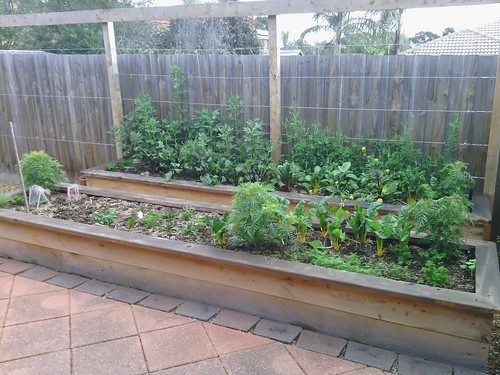
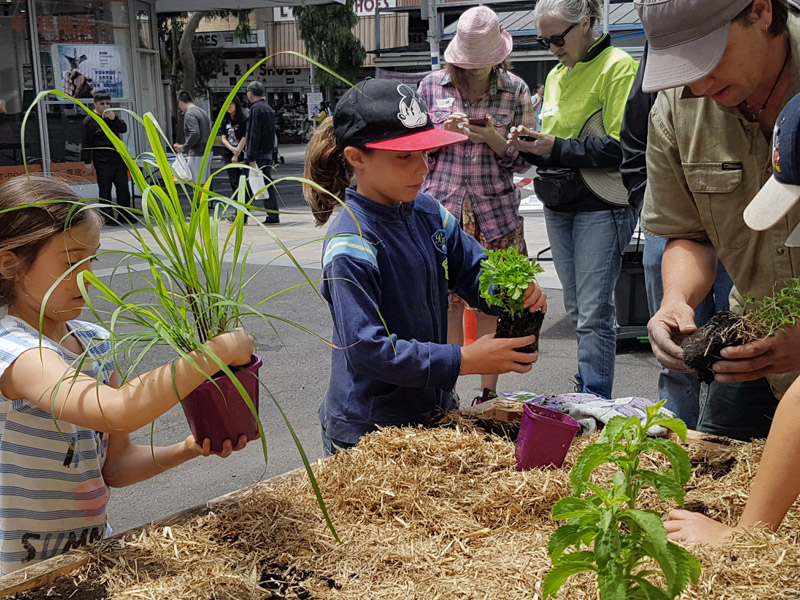
Then you have your happy soil and plants on top of this.
The last essential piece of the wicking bed puzzle is that you need an overflow point (usually a pipe) so that the soil layer doesn’t get flooded, which would kill the soil life and plants by rotting their roots. (With the VEG Wicking Bed style ones you install them before you add the soil or stones.)
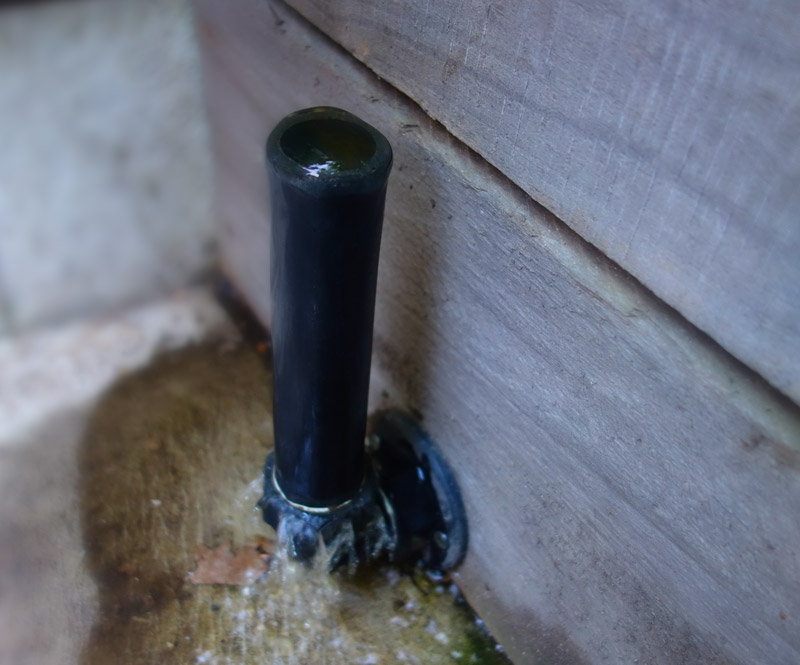
lets you also observe water levels
and periodically drain & flush your bed
As you’ll know if you’ve researched wicking beds online, the available information is scattered about the web in dribs and drabs and often with advice that contradicts what the other site said. So, taking it all with a grain of salt, we set out to learn by doing, our initial intention to prove to ourselves that wicking beds didn’t work. We gave it a pretty good shot, and in the process we learned a lot, and refined how we go about them enormously.
We’ve condensed all this knowledge into our How to Make a Wicking Bed sequence. But before you rush out and build one, take a moment to consider the pros and cons…
Pros and Cons
Q. “How do I know if wicking beds are right for me?”
Let us level with you here. Yeah, we sell these things. And we love them. But, we’re not interested in selling them to anyone where it’s not the right solution. Jeremy (our sterling Wicking Beds Manager) needs some days off to practice his drumming anyway. So this is our truest, honestest, bestest list of the formidable pros, and some realistic cons of wicking beds. So read on, to help decide whether or not wicking beds are the right choice for you.
Pros
- Easier gardening. In the garden, overwatering can be just as big an issue as underwatering. With wicking beds, the observation pipe eliminates the guesswork of knowing when and how much to water!
- Happier, healthier, more productive veggies. Veggies love wicking beds because they a provide low-stress environment of constant, optimal moisture, good for soil life, and good for your plants. You’ll get more food, from less space! Here’s an easy visual to help:
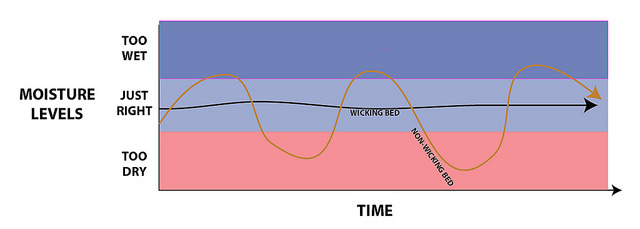
The Wicking Bed H2O sine wave
- Less weeds. In wicking beds, the surface of the soil is relatively dry, making it more difficult for weeds to germinate.
- Use less water. Oh, we haven’t mentioned this yet? Wicking beds flourish with a lot less water than normal raised beds. Think something in the ballpark of one third to one half less water for each kilogram of produce.
- Water less often. Wicking beds need watering much less often, meaning plants will survive and thrive for days, or even a couple of weeks, even if you go away during in a heatwave.
- Grow on any surface. Wicking beds are a great solution for spots where eucalypt or other vigorous tree roots might invade the bed. As water and nutrients are prevented from soaking through the bed base, the trees won’t even realise the veggie bed and its rich soil is there! Wicking beds can be built on top of concrete, paving or contaminated soils, while keeping the soil in the bed separate from what’s underneath.
Cons
- Trickier to install. Wicking beds require some technical understanding and skill to be built properly; they can leak, or over-saturate the soil, either due to poor design or being installed incorrectly. (Our kits are designed to make it easier and come with clear instructions though, so you get it right the first time!)
- More expensive. Wicking beds typically cost a bit more to set up than non-wicking beds.
- More materials. Wicking beds generally require some non-renewable materials, i.e. poly pipes and liner, as well as screened crushed rock which is probably fairly energy intensive to produce. (We minimise this by using food-grade poly liner, and poly components, rather than PVC, for human health and environmental reasons.)
- You can break them (if you try hard enough). Wicking beds are not quite idiot-proof once installed. For example, it is possible to pierce the liner if you drive a tomato stake into a wicking bed too deep and enthusiastically. Trust us, we’ve repaired damaged beds, and it’s not fun to dig everything out to replace the liner!
- Some training required. Wicking beds do require a little bit of knowledge or training to be used properly – what we mostly mean here is keeping the water level topped up through the inflow pipe rather than surface watering, draining the reservoir occasionally, and not hammering in tomato stakes… It’s actually very easy! But they may not be appropriate if a wide variety of untrained people manage the beds.
If you think they are for you, you can jump straight to checking out our kits, or contacting us about installation services.
They just work!
Ok, so you do want to consider your options, but here’s what one client, Rosalie, said about her beds:
The original two wicking beds were so successful that I had the other three converted. One of the original two was planted with silver beet when I went away in Sept 2014 and another non wicking bed also planted. I was away for four weeks. When I came back the difference between the two beds was amazing. One was lush, the other just OK. This was what convinced me to convert the other three.
As for water usage, they are a miracle. I have only a 3000L tank and it would regularly run out in the first month of summer. Since the wicking bed installs I have had two summers and the tank hasn’t run out for either. I know this has a lot of other variables like temperatures and rainfall, but anecdotally they save water. I fill them once a week, or twice if we have baking heat in the high 30s+. It takes far less time to fill them than if I had the dripper system running – i.e., minutes as opposed to hours.

headquarters
The reason we recommend and install so many wicking beds is that they work. In Melbourne’s hot dry summers the veggies continue to thrive with a fraction of the water otherwise required. On the two occasions we have installed or converted one or two of a larger number of raised beds as wicking, the customers have both in short order got us back to convert the rest. The difference in plant health and growth is just so stunning.
Getting a Wicking Bed
Righteo then! If you’d like a hand getting your wick on in your backyard, then there are three main ways we can help:
- Go it alone option. First, if you are anywhere in the world, you can read and apply for yourself our unique process of installing wicking beds: How to Make a Wicking Bed (free – yay!)
- VEG Wicking Kits option. Second, for anyone in Australia, we can post you one of our wicking bed kits (including detailed instructions) so you can convert or build your first wicking bed knowing you have the right components.
- Fully installed option. Third, for anyone in Melbourne, we can come and fully install raised wicking beds at your place where we supply everything (if you want we can even supply and plant the veggies). Alternatively, we can come and convert your existing raised veggie beds to wicking in most cases. Just drop us a line!