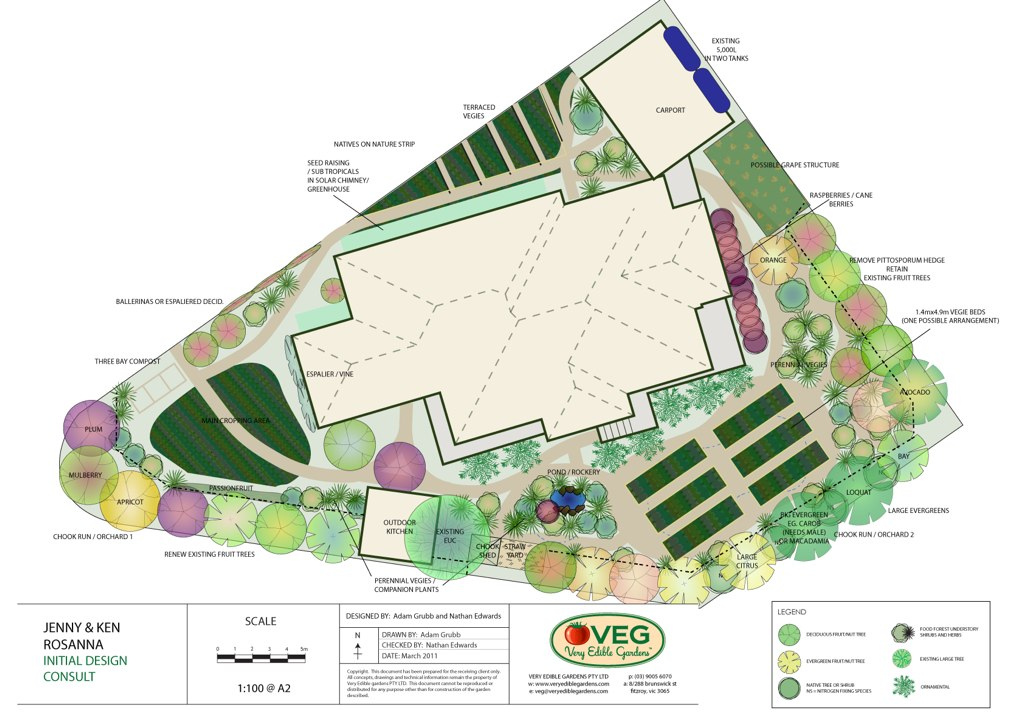
We did a design for Ken and Jenny in Rosanna a few years back now (view larger version of design here):
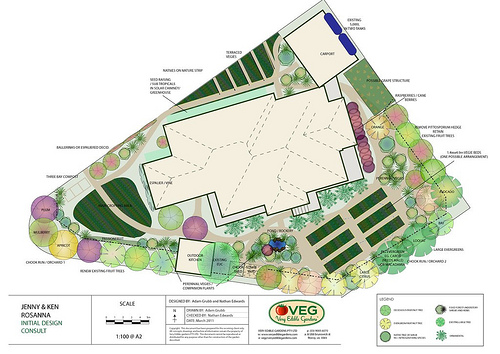
As you can see a core theme of this design is serious fruit, vegetable and egg production. Here is a photo shortly after we finished installing the VEG Beds. As an aside, underneath these vegie beds is a large swimming pool that forms part of the summer cooling system for the house. Interesting stuff and a great way to make use of a swimming pool ;-).
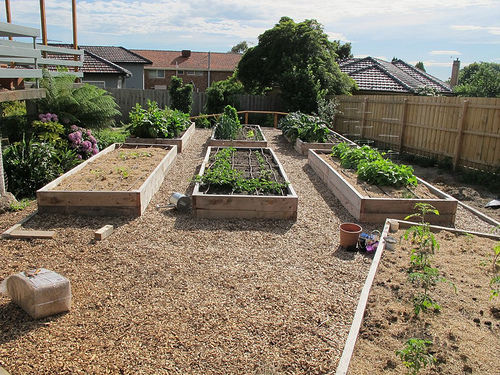
Anyways, getting to the point of this article, of the seven raised beds we put in (all about 4m long by 1.4m wide by 40cm high), one was wicking. A few weeks back Ken and Jenny got in touch letting us know that the production and the reduced work of the wicking bed was so substantial that they wanted to not only have us convert the six non-wicking beds to wicking, but they wanted a further five wicking beds installed. They said that the wicking bed has effectively not required any watering except in the hottest weather when it needed a weekly top-up. Healthy veggies with weekly water during the extremes of a Melbourne summer is a not bad gig!
There is a lot of interest in wicking beds lately, and so we thought we’d talk through the technical details of what we did in this case. Think of this as more as a guide to some of the things you need to think about as opposed to a rigid template to copy. We actually usually do wicking beds slightly differently, but in this case we decided this was the best solution.
Here we are getting started on retrofitting the existing six non-wicking beds to be wicking…
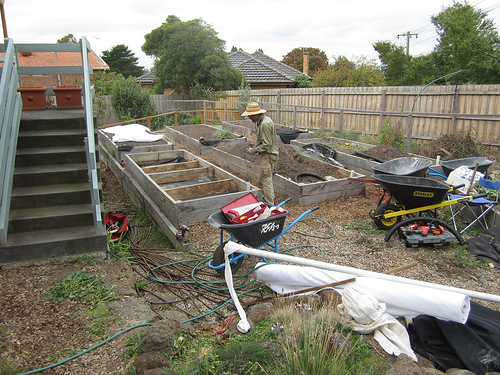
And getting into it…

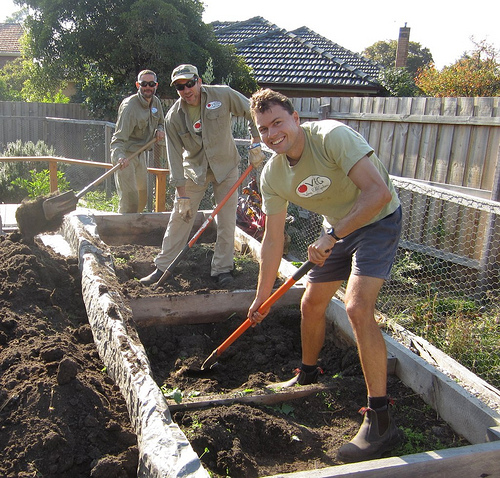
From left Matt, Michael and Will
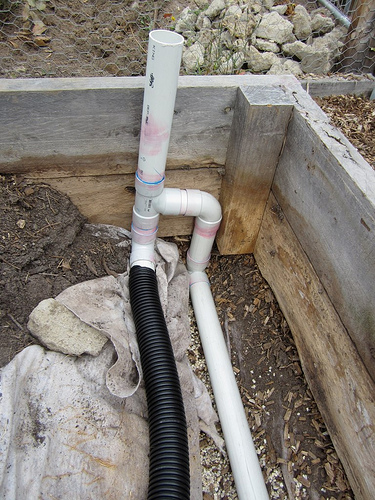
Here is the plumbing assembly we used in this case.

Moving in closer let’s go through what’s happening here. So the pipe sticking up in the air is both the water inlet pipe you use to top up the bed when the reservoir of water beneath the soil runs low, and you can use to visually inspect the water level. Now let’s go through what happens when you stick a hose into the end of the pipe sticking up and turn it on. The water flows straight down the (55mm diameter) pipe, around the 90 degree bend and straight into 50mm diameter slotted aggy pipe. Slotted as in full of holes, designed to leak like a sieve. This aggy pipe will sit above the rubber pond liner we put in next. The pond liner in turn will sit above the white pipe running along the base of the bed.
This pipe is an overflow, designed to take excess water from this, and two other beds, to the fruit trees in the adjoining orchard (with water our philosophy is waste not want not!). We can do this with gravity, as the beds are slightly higher than the orchard. As the water continues to flow, however, the pond liner, and the basalt fines (little rocks) about to be within it, will start to fill up (as per the next photo).
When the water level reaches the height of the tee-piece you can see, the reservoir is full, and any further water (including surplus rain) then exits via the tee-piece overflow pipe, and on to the fruit trees. This means it is impossible to overfill the bed (and drown any veggies in it)…
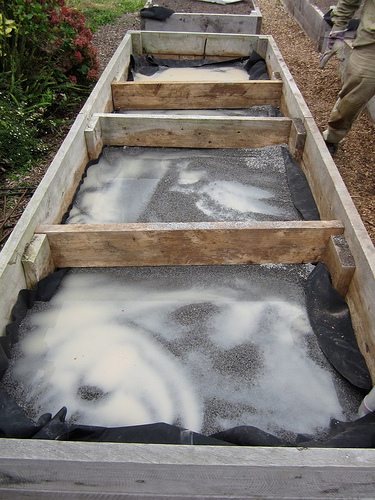
Here you can see the rubber liner, the basalt fines, and the water level just before it starts overflowing. Ideally you want to be between this point…
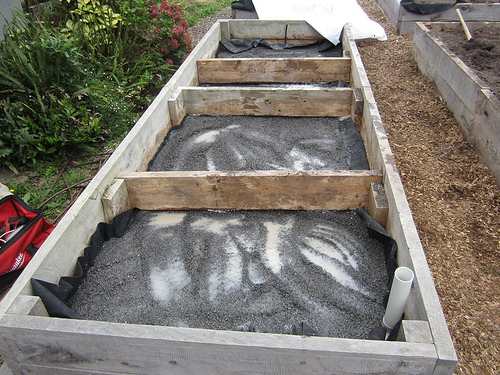
And this point, when the water starts overflowing….
In this next photo, with the wicking reservoir installed, we’ve simply rolled out a layer of geotextile landscaping fabric and then started refilling the bed with soil.
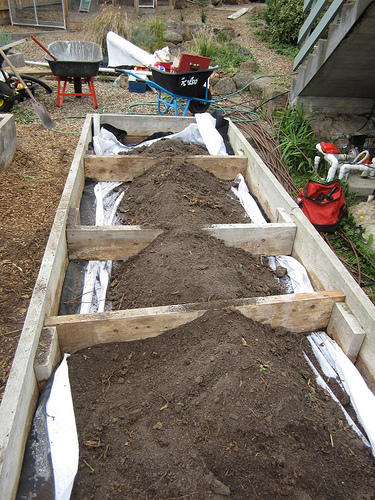
Within 24 hours the water (and the minerals in the basalt dust amongst the fines) had started wicking up into the soil and the beds were lovely and moist, ready for planting. In this case we had a water/basalt layer of about 15cm and a soil layer of about 35cm.
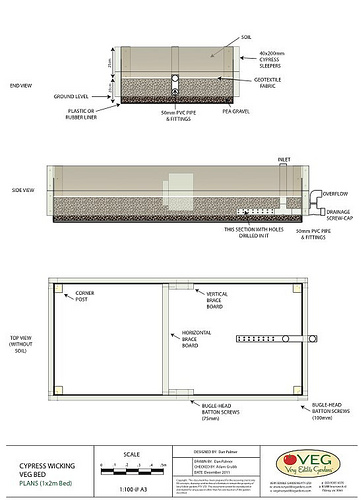
In case any of that wasn’t clear, for your interest here are some old plans of a slightly different past method we have used, with a drainage option which is a bonus if you can swing it (over time the water can get a little over-nutrified so good to be able to dump it then start again):
And a link to some older blog posts on fixing a damaged wicking bed, a community wicking bed install we did (see part two here), a permablitz where two VEG wicking beds were installed, and one of our first-ever wicking beds back in 2010…
Also if you want some guidance or a hand to build wicking beds, then you need only ask. We have seen many cases of people putting a lot of effort into wicking beds only to find they turn out to be leaking beds, so we really recommend getting your head around the critical considerations first, and if you are making more than one, try it out for a bit before making the others. That said, have fun and good luck on your wicking adventures!


